First Look : Installing / Upgrading vCenter Server Appliance (VCSA) 6.7
I'm sure everyone is aware of the recent vSphere 6.7 launch a couple of days back. It is literally plastered all over social media (at least on my news feed). Together with vSphere 6.7, VMware introduced updates to a bunch of other products which includes vSAN, vSphere Replication and etc. I will try to review some of them in the coming weeks hopefully.
As with most updates for vSphere, the first components that needs updating will be vCenter. One of the major updates in vCenter 6.7 is the Clarity UI which is based on HTML5 (it was technically there in v6.5, but wasn't feature rich enough to be usable for day-to-day operations). Some may have gotten a preview of its look and feel with LogInsight, vRealize Operations and even VMware on AWS previously. Now, that consistent look and feel is standardised across the vCenter suite too.
I have put together a few screenshots of the new installation/upgrade process for vCenter Server Appliance (VCSA) 6.7, for those who are interested.
For more details on the new features on vCenter 6.7, you can read more here.
1. Obtain the latest vCenter Server Appliance.
2. A similar GUI like before, a modernised feel to it. I'm gonna go with Upgrade since I have an existing instance of VCSA 6.5.
3. It will then display the 2 phases in the upgrade. Stage 1, would be deploying the new VCSA appliance and Stage 2, would be configuring / restoring the configuration of the existing VCSA. Go "Next", and accept the EULA agreement.
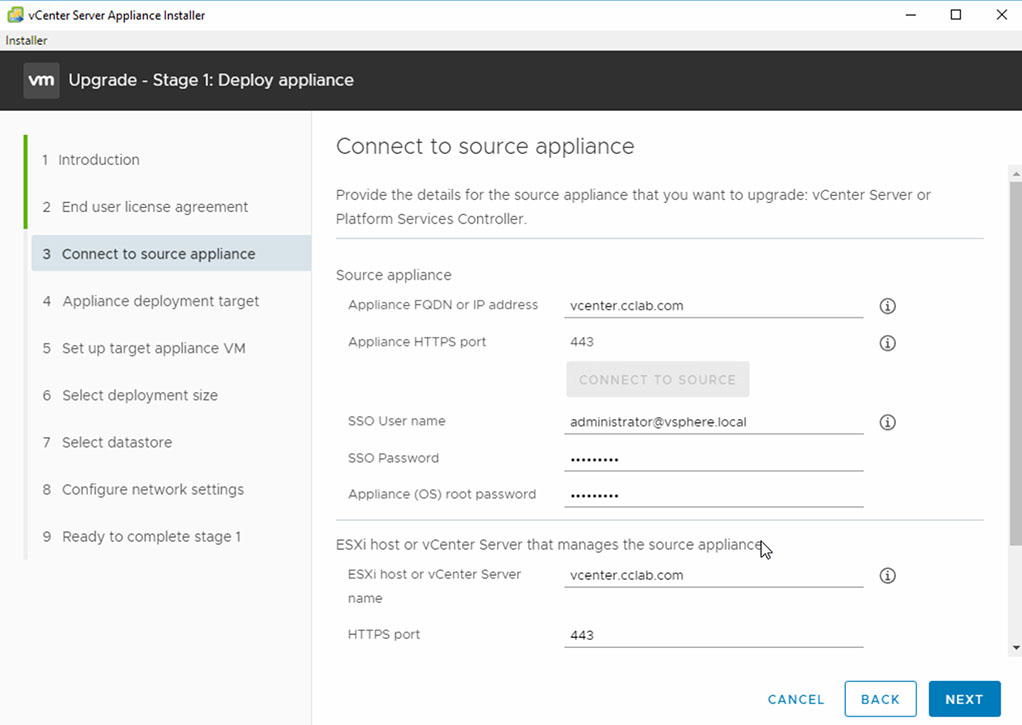
4. Fill in details of the Existing VCSA. Fairly straight forward, and as always with all vSphere Environments, it is very critical that DNS services is resolving properly.
5. Next, fill in target ESXi host (physical host that will host your 6.7 VCSA VM), followed by details on the new VCSA 6.7 Appliance.
6. On the next screen, you will be prompted for the size of the datastore. I've notice there wasn't an option for "TINY" from the "Deployment Size" pulldown. I'm assuming its because some of my configurations or core dumps previously is over the TINY threshold, hence leaving me with the Small option.
7. You will need to assign a Temporary IP Address for the deployment of the new VCSA. It is only used for the duration on the install. Upon completion, it will be released and swapped back to the original VCSA IP addresses.
8. Verify the details of the deployment, when ready, click Finish.
9. The deployment process will take around 15-20 minutes. Upon completion, you can continue to Phase 2 or save it for later.
10. Let's go ahead with Phase 2.
11. The installer will perform Per-Upgrade Checks on the environment. It took around 5 minutes, but mileage may vary for larger environments.
12. You will be given the option on this screen as to how much historical data you would like to migrate onto the new appliance. It gives a high level assumption on the time taken. I have this running on a 1GbE environment, so those running on 10GbE, probably may have better migration rate.
13. By default, CEIP is opt-in. You can choose to unsubscribe, but it is strongly recommended that you keep it checked. Next, verify all the inputs and click Finish.
14. Sit back and grab a coffee...
15. When done, access vCenter like you always do. Note, the old web client is still very much alive! Just in-case you have withdrawal symptoms...
I will not go too much into the differences between 6.5 & 6.7 in this post. Having said that, I have included 2 screenshots below to give a teaser of how it looks like.
Will probably do a post soon about changes specifically on vSAN Management in vCenter 6.7. Stay tuned!


